The Inspiration Behind the Media Wall Project
I’m excited to share the inspiration behind our latest DIY project – the Media Wall. If you’re anything like me, home renovation ideas can sometimes feel overwhelming, but they can also be incredibly rewarding. Living in Seaham, our customer wanted to create a space that not only showcases their love for media but also enhances the overall aesthetic of their home. . We decided to blend functionality with style, and I must say, the process has been an absolute joy!
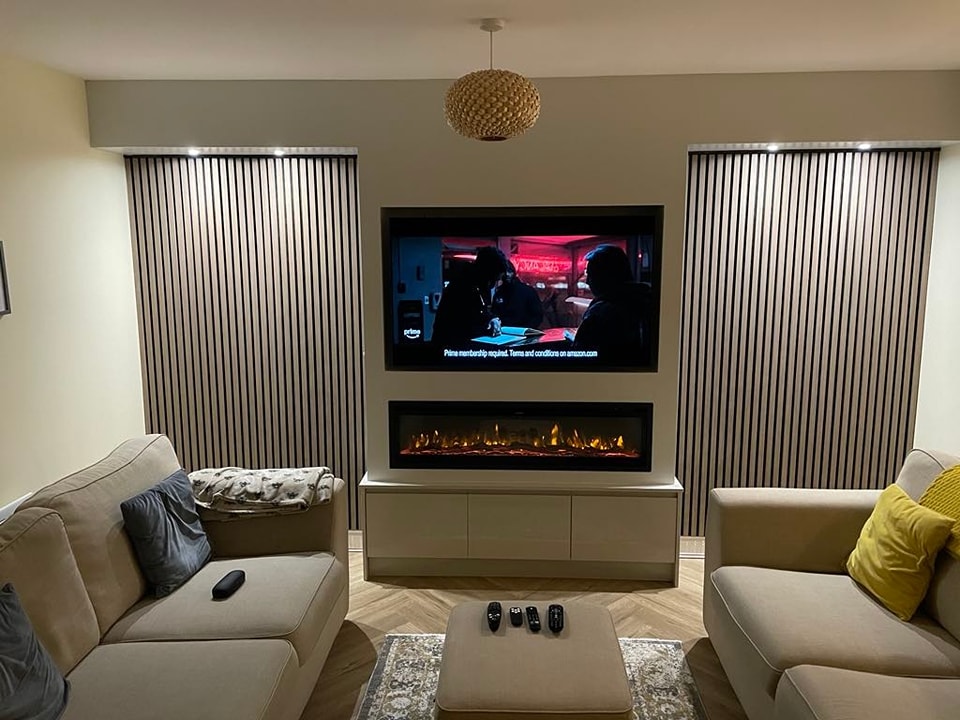
We incorporated clever storage solutions for DVDs and games while ensuring there was ample space for a stunning TV display. The design also features some beautiful Decorative wall panels that truly reflect the homeowner’s personality.
As we worked through the project, it became clear how important it is to create a space that resonates with your tastes and preferences. From selecting the right paint colour to choosing complementary materials, every decision had its significance. For those who might be wondering where to start, my advice is simple: begin with what inspires you!
Choosing the Right Materials: What We Used for Our Media Wall
If you’re thinking about building your own media wall, I’m here to share what we used and hopefully make your DIY journey a bit smoother. Choosing the right materials is key, so let’s dive into some of the DIY supplies we found most useful.
First off, when it comes to the best wood for DIY projects, we opted for plywood. It’s sturdy yet lightweight, making it perfect for supporting our media equipment without adding too much bulk. Plus, it’s super easy to work with if you’re planning on cutting or shaping it yourself.
We also decided on a soft matte finish that not only looks sleek but also helps reduce glare from screens—a real bonus! You might want to consider using a paint that’s durable and easy to clean since media walls can get a bit dusty over time.
We also used decorative wall panels and lighting to enhance the aesthetics.
With the right materials in hand, creating your dream media wall can be both fun and rewarding. If you have any questions or need more tips along the way, just give me a shout!
The Step-by-Step Process: Building Our Stunning Media Wall
First things first, gather your materials. You’ll need some MDF boards, brackets, paint or wallpaper for that stylish finish, and of course, tools like a drill and level. Once you have everything ready, it’s time to plan your layout. Consider how you want your media wall to function – do you want shelves for books? A spot for your TV?
Next up is the assembly! Start by measuring and cutting your MDF boards according to your design. Then secure them using brackets for added stability. Don’t forget to double-check that everything is level!
With a bit of patience and creativity, you’ll end up with a gorgeous media wall that’s not only functional but also adds character to your home.
So roll up those sleeves; let’s get building! If you have any questions as you go along, feel free to reach out—I’m here to help!
Troubleshooting Common Challenges in Your Own Media Wall Project
If you’re diving into a media wall project, you might run into some common DIY problems along the way. Don’t worry; it happens to the best of us! One of the biggest challenges is often miscalculating space or not accounting for cable management. But fear not, fixing mistakes in home projects is all part of the journey.
To tackle these media wall challenges smoothly, start by double-checking your measurements before cutting anything. It’s a simple tip but can save you a lot of hassle later on. Also, consider using templates for mounting your TV and shelves—this can really help visualise how everything will fit together!
If you encounter any hiccups, remember that it’s perfectly okay to ask for help or even consult online tutorials. There are plenty of resources out there that can guide you through specific issues you might face. With a bit of patience and creativity, you’ll be well on your way to creating a stunning media wall that you’ll love showing off!
Join Us at DIY Supplies North East Seaham and Start Your Own Project Today!
I’m thrilled to share the final reveal of our finished media wall project in Seaham. It’s been quite a journey, and I can’t wait for you to see the transformation we’ve achieved.
We’ve captured some stunning after photos that truly highlight the incredible difference decorating your media wall can make. From a plain space to a vibrant focal point, this project showcases our work beautifully. Whether you’re looking for inspiration or just curious about what we’ve accomplished, I hope these images spark some ideas for your own home! If you have any questions or need tips on how to elevate your media wall, feel free to reach out—I’d love to help!